For your convenience, simply follow the detailed step-by-step written instructions below. These instructions will guide you through the process to ensure a smooth installation of your BlindMaster. If you need further assistance, you can reach us at support@theblindmaster.com or connect with our live customer support agent.
Measure together with our team
Safeguard your order
Hire an expert for assistance
Locate assistance available in your region
Have questions?
Schedule a complimentary consultation
What's in the box?
Assembly components
Weather stripping
Brush seal
Screwdriver tool
Everything required for installation is included in the box—no additional tools or materials are needed.
Five Simple Steps to Assemble BlindMaster
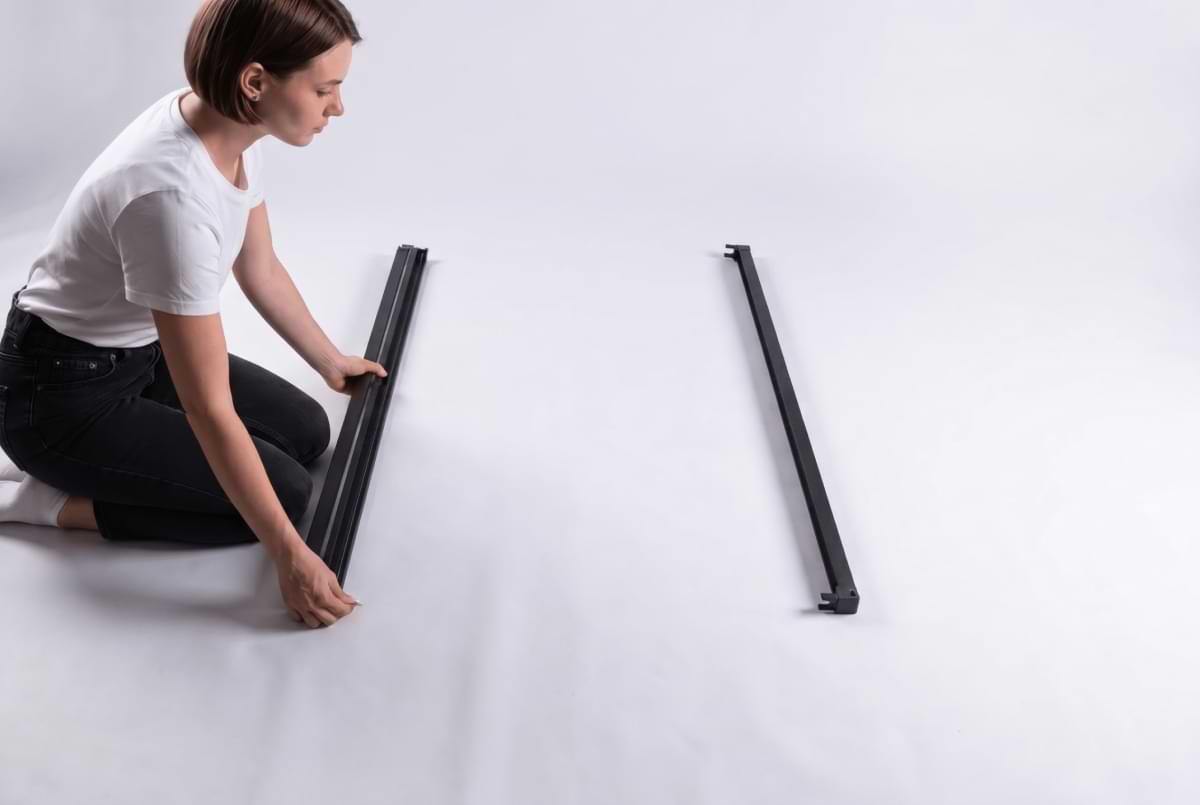
tep 1: Lay out the side frames
Unpack the side frames and position them on a clean, flat surface, making sure they are parallel and that their inner channels face inward for easy assembly.
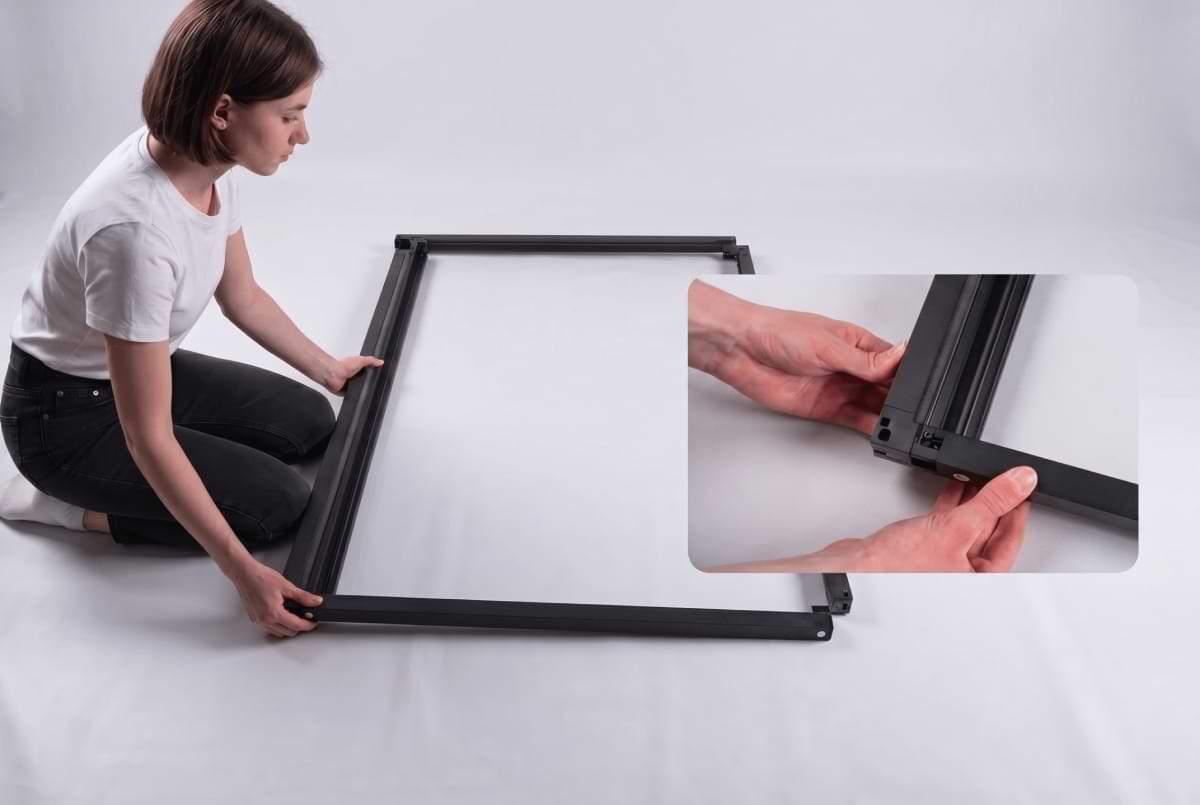
Step 2: Position the top and bottom frames
Arrange the top and bottom frames so they are parallel to each other, ensuring that the numbered labels on the connecting ends align correctly.
Step 3: Connect the frames
Connect all the frames by attaching the fabric and side frames to the top and bottom frames. Once assembled, test the blinds by closing them to ensure they latch securely.
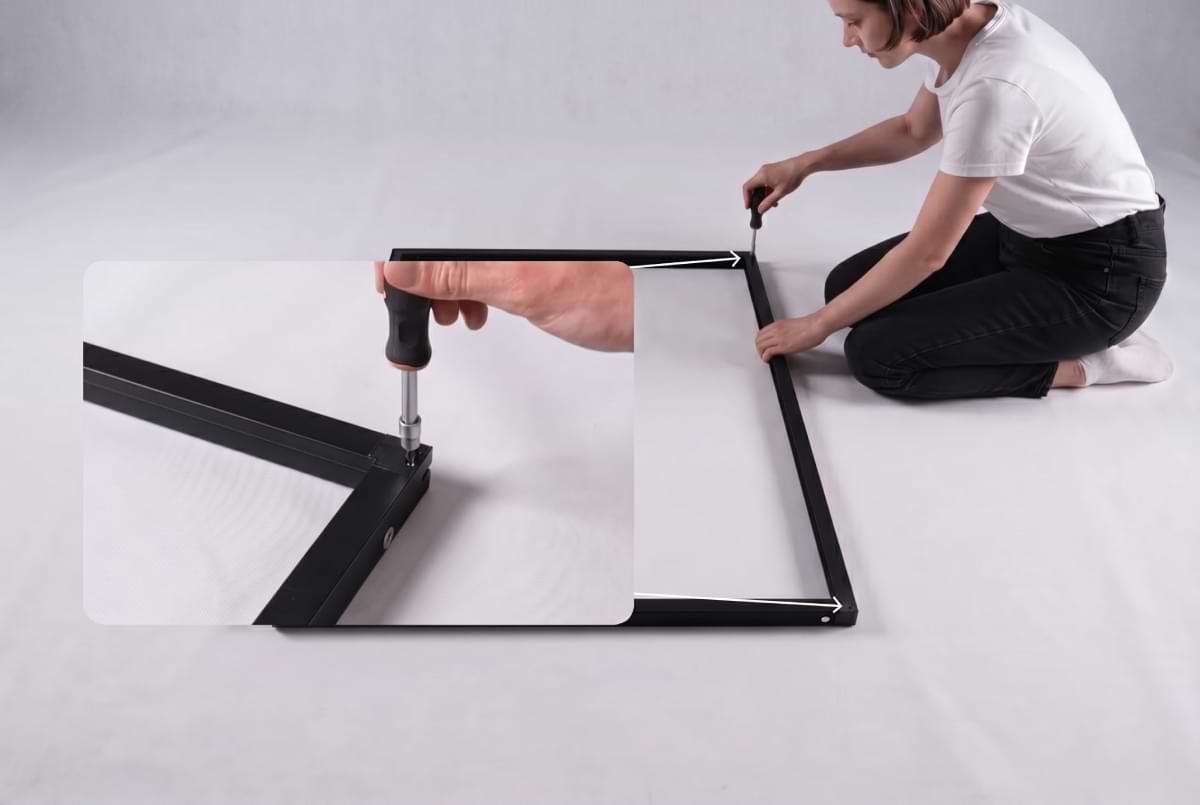
Step 4: Tighten the cords
(Skip this step if your blinds latched properly in Step 3.) Using the provided screwdriver, adjust the two screws in either direction until the internal cords are evenly tightened on both sides. Note: Increased cord tension makes closing the blinds more difficult—adjust to your preferred level. If the cords are too loose, the blinds may not close completely or could pop open.
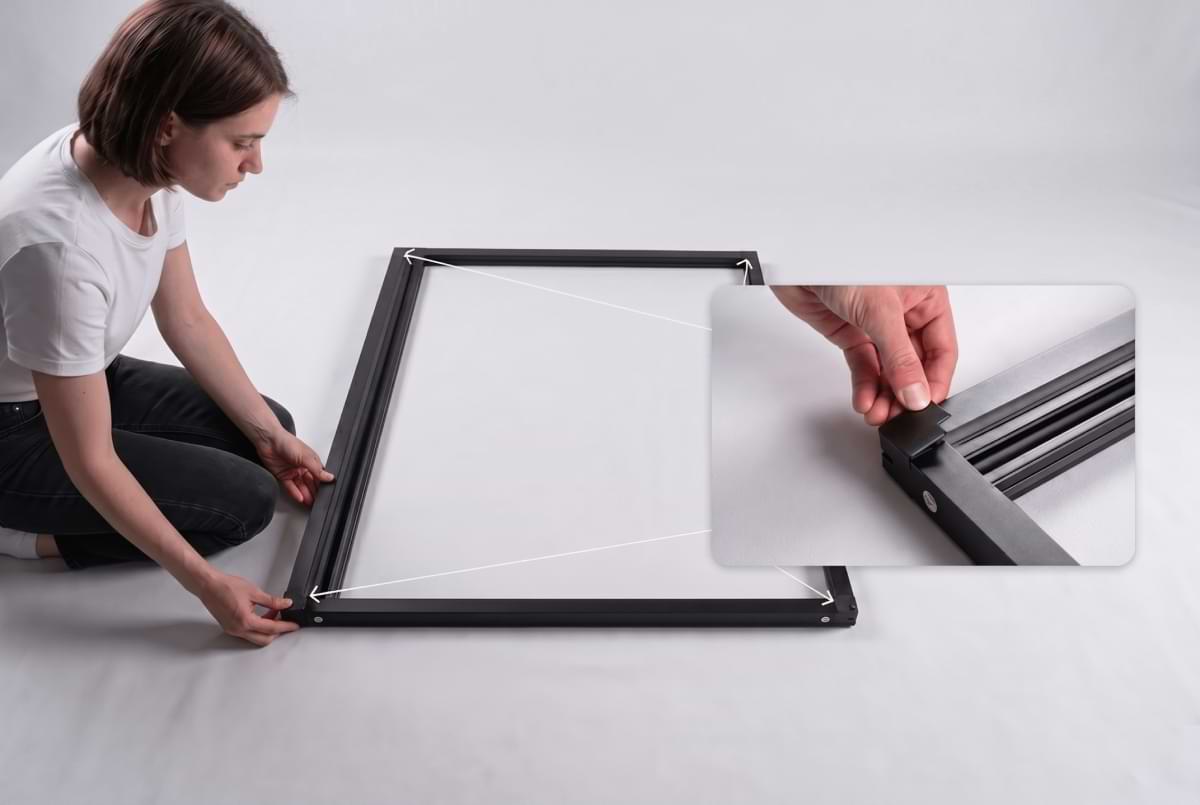
Step 5: Insert the corner caps
Press-fit all 8 included corner caps onto the frame—4 on the front and 4 on the back. Make sure each cap sits perfectly flush to protect the edges and prevent any light from leaking through the corners.
Six steps to install BlindMaster
Step 1: Split the weather strip
Divide the supplied weather strip into two equal sections.
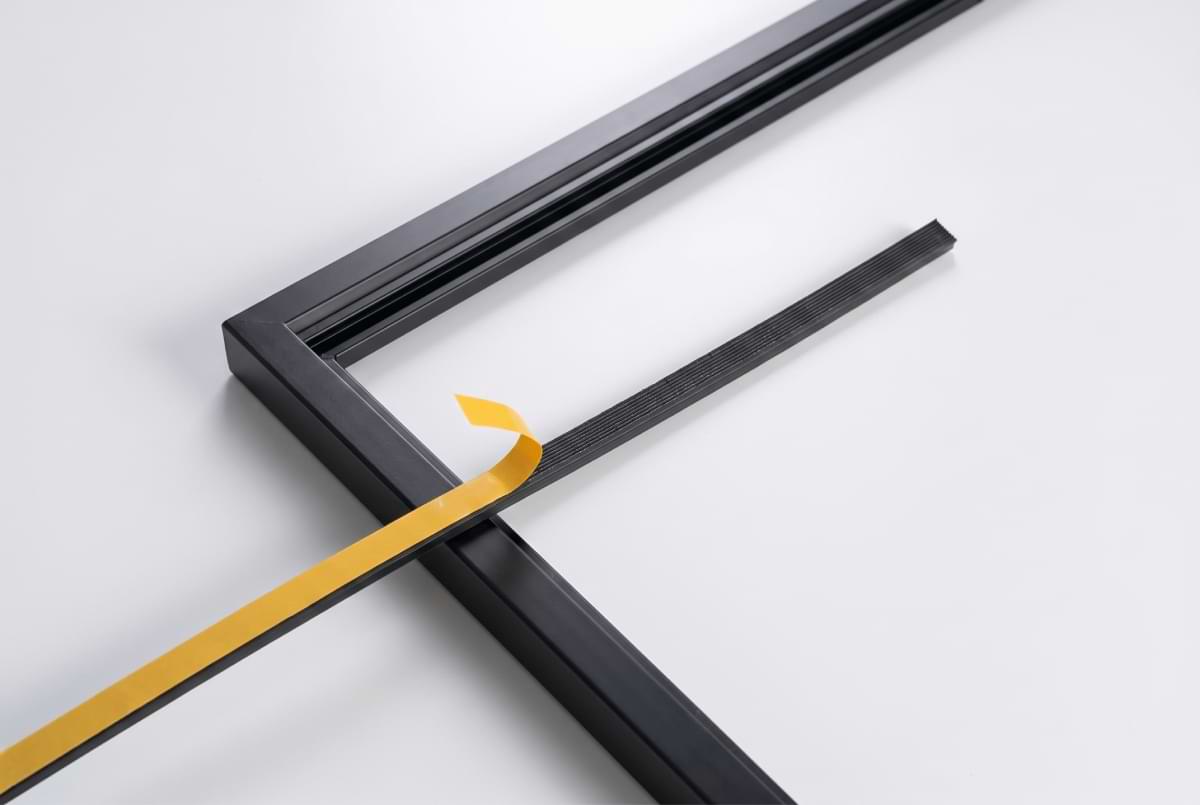
Step 2: Remove the backing from the weather strip
Remove the protective backing from the weather strip to reveal the adhesive side.
Step 3: Apply the weather strip
Apply the weather strip along all four sides of your BlindMaster, making sure each edge is fully covered without any gaps. Note: For best results, position the weather strip as high as possible on the frame.
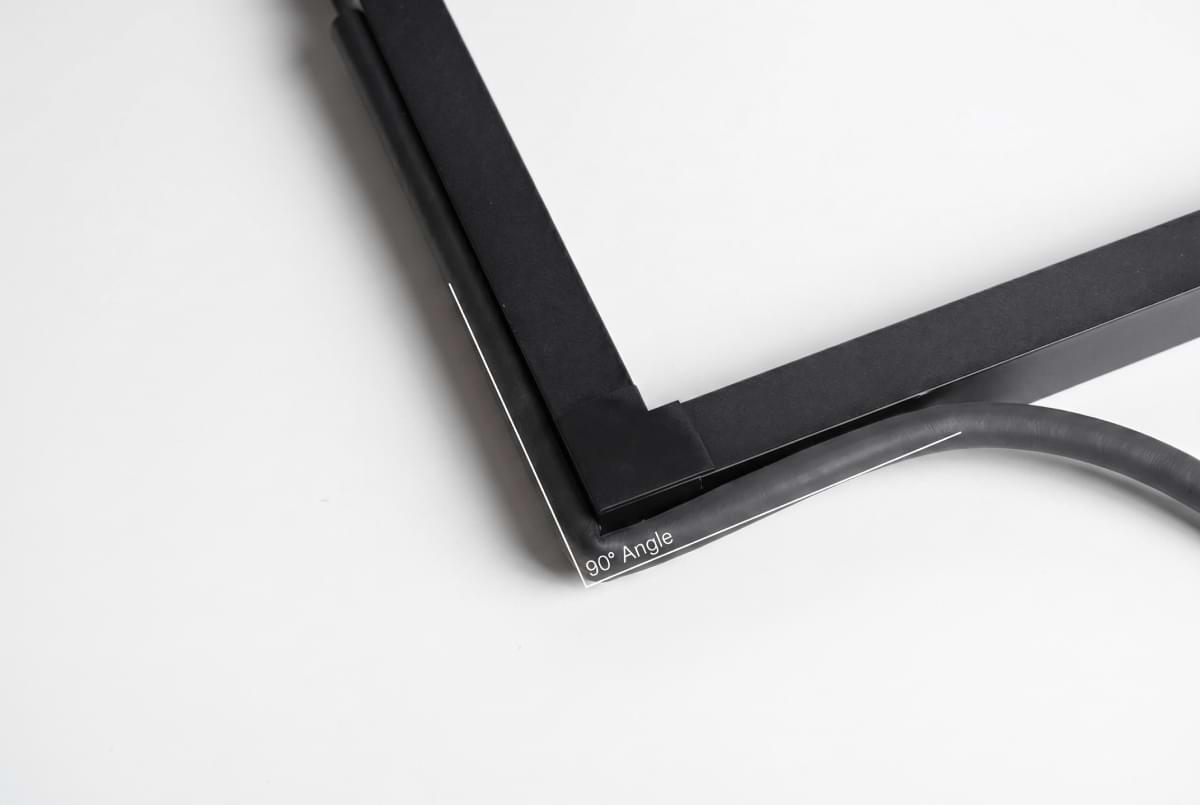
Shape the corners
When applying the weather strip, avoid stretching it around corners. Keep the strip relaxed and fully seated, forming a crisp 90-degree angle to match the frame. Pulling it too tightly may create small gaps at the corners, allowing light to leak through.
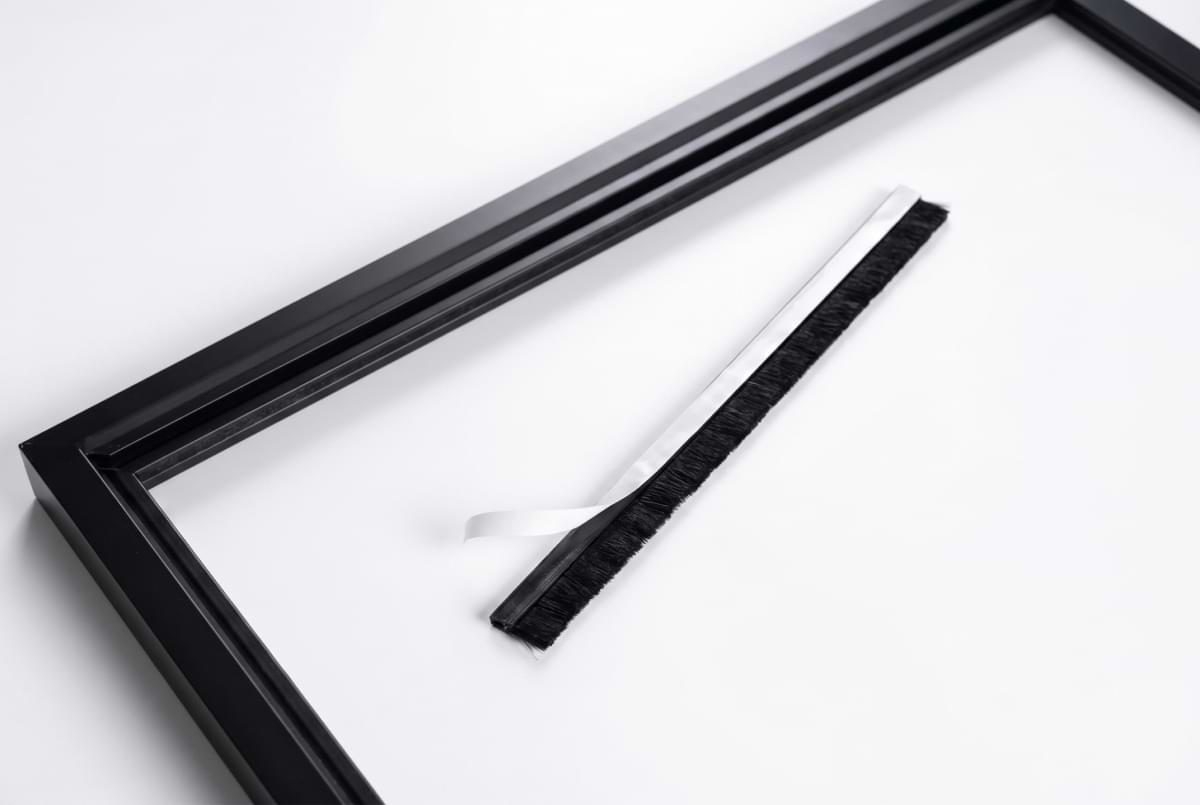
Step 4: Remove the backing from the brush strip
Remove the protective backing from the brush strip to reveal the adhesive side.
Step 5: Apply the brush strip
Apply the brush strip to all four sides of the frame, positioning it directly beside the weather strip. Note 1: Cut the brush strip at each corner. The side strips should extend slightly past the frame edge, while the top and bottom strips should finish flush with the frame, creating a neat 90-degree angle at every corner. Note 2: For optimal appearance, apply the brush strip as low on the frame as possible, behind the weather strip. This will provide the best look for your blinds once installed.
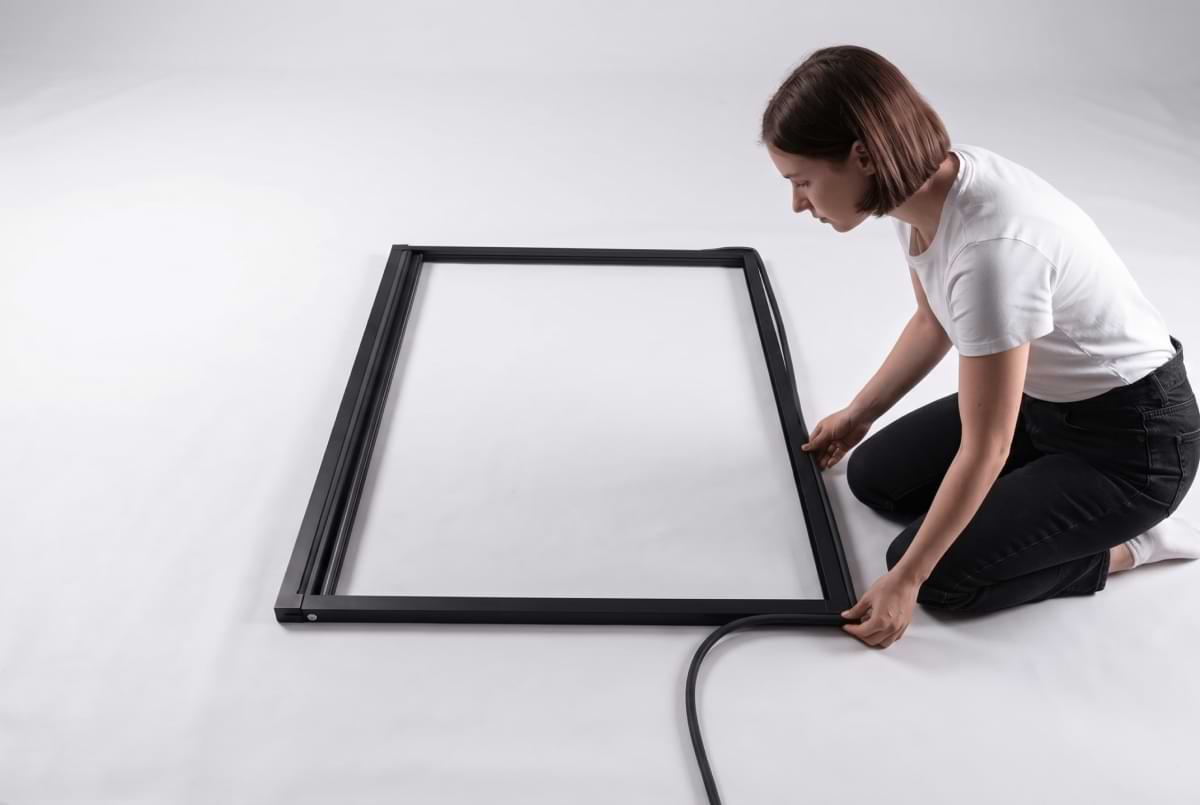
Step 6: Insert and test BlindMaster
Insert the blinds into your window recess at a 70-degree angle. Begin by positioning the bottom of the blinds securely into place, pressing it firmly down. Then, push the top of the blinds into position. Once installed, open and close the blinds to ensure they operate smoothly.